Thursday, May 19, 2016

Review and Techniques with Prima Water Soluble Oil Pastels


I recently ordered some Prima items and among them were the Water Soluble Oil Pastels. Since one of the boxes came dented up I decided I would keep that one for myself (since the contents were likely damaged- and they were) and write a review about it. 

These pastels come in a box of 24 and retail for $20.00. Simon Says Stamp sells them. We also sell them but by the time this blog post goes up we'll probably only have a couple left

Once I opened my box I got right to work seeing what these worked well for and maybe not so well for. 

First technique was general coloring. The pastels are very creamy and would even draw on the tip of my finger. I tried scribbling on a thin sheet of non primed paper and it easily took the pastel. I added some water with my paint brush and it easily made the numbers I had written disappear. They are very soluble even on a non primed surface. 

Second technique was mixing with a gel medium. I chopped off the end of one of the pastels with my palette knife and smashed it into some Prima 3D Gloss Gel Medium . It's not as creamy as a gelato so it took quite a bit of smashing to get it mixed in. I used the red color and you can see the result of me applying it through a star stencil on the picture below on the right. 

On the left side of the picture you will notice some light green dots over a purple wash of color. The purple wash of color was added on top of some dried Prima 3D Gloss Gel to see how it would react. I wanted to see if the water soluble oil pastels would stay on that medium or if it would act as a resist. It dried and stayed on it just fine. Then I was able to scribble the oil pastel on a non porous surface and mix in some Liquitex Gloss Gel Medium to create another colorful mixture to put through a stencil. This blended much easier than chopping off the end of a pastel. 

For my next technique I thought it would be fun to see how they worked on enhancing texture. I added some Golden Molding Paste to my journal and dried it with a heat tool to create some bubbles and get a lunar type of texture. Then I lightly scribbled on top of the texture, squirted some water on it, and blended it out with my finger. Here's the effect: 
It really gets into all of those small nooks and crannies and really accentuates the texture! 

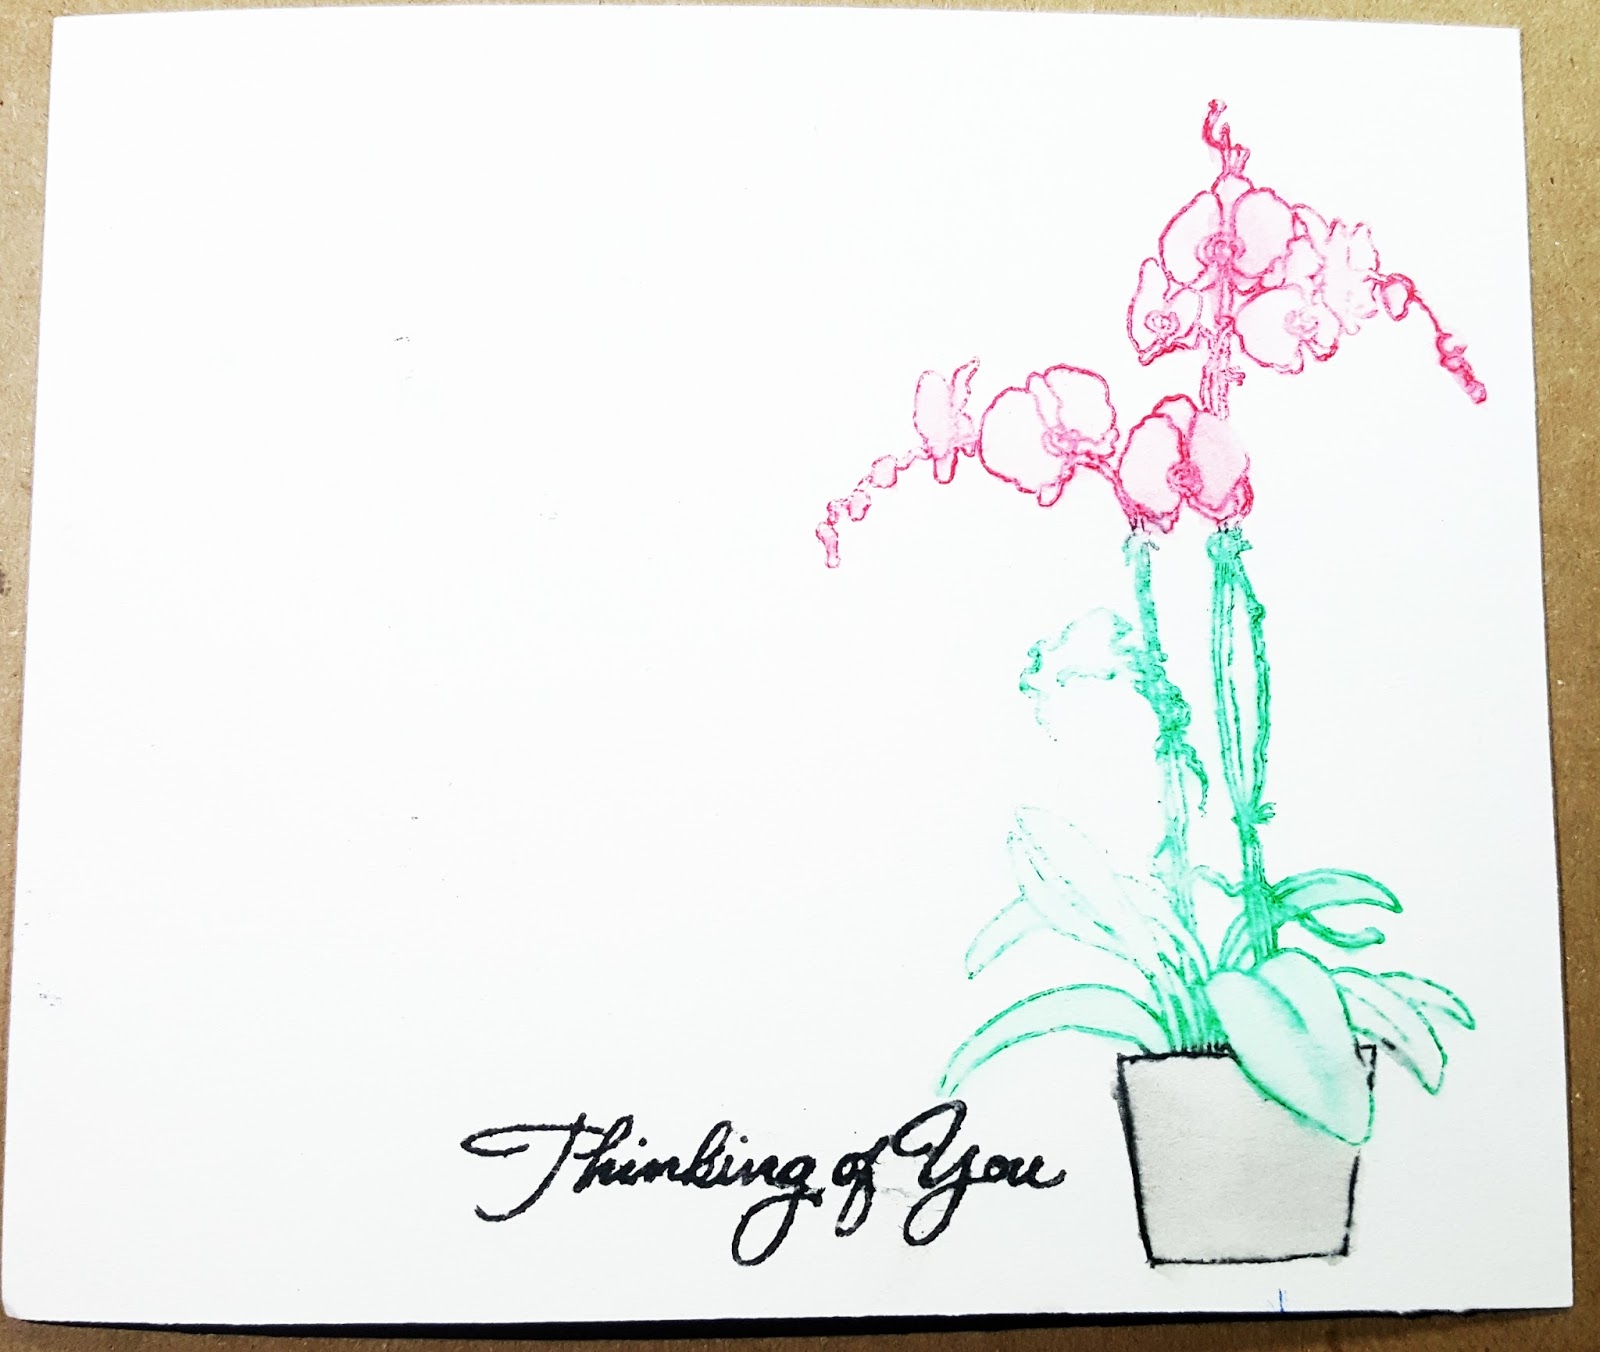
Next I wanted to see how these worked for stamping. This one of my favorite techniques with these pastels and it's enough to make me happy to own them! All you do is scribble on the back of a stamp and give it a few mists of water and stamp down. You can then use a waterbrush to draw some of the color from the edges to the inside or even grab color directly from the oil pastel to add to your image. Here's how it came out on 140 lb watercolor cardstock using a photopolymer stamp: 

Lastly I tried it on a rubber stamp with 3 different colors to see what would happen and that came out nice too. Here's what that looked like with a woodgrain stamp: 

If you like these techniques then I definitely recommend checking out the Prima Water Soluble Oil Pastels

Prima Flowers ARTIST QUALITY OIL PASTEL CRAYONS 814328
Here's a video I put together showing all of these techniques in action! 

Friday, May 13, 2016

Best Tools for Getting a Perfect Stamped Image

In today's high tech world we have so many options to chose from even in the crafting world! Today I am going to run through some of the various options we crafters have to chose from to get a crisply stamped image. I'll briefly explain the best situations for each tool and why you may want more than just one of them depending on the type of stamp you have.

Standard Acrylic Block. 

This is the cheapest option but it can also be the most frustrating. Regular acrylic blocks are great for stamping images that you will be cutting out later or the placement is unimportant. They're also good if you are stamping something that you will be adding to your card. I do not recommend using a standard acrylic block to stamp something on a card base that you have put a lot of time into. The reason is because it can be easy to stamp the image poorly and it's hard to place your stamp directly back on top to re-stamp it. It's also hard to stamp sentiment stamps perfectly straight when you are basically eyeballing it. 
Apple Pie Memories makes some good acrylic blocks. There's have grooves in them that makes getting a grip easy. They also have a grid laser etched in them which makes lining up your stamp easier. 
Inkadinkado also makes a large one which is the one I own. 
Prima makes one that has a handle. Many people like that but I actually feel like that gives me less stability. 
If you get an acrylic block I highly recommend getting one with an etched grid and finger grooves. There's some cheap ones out there without these features and I feel that they are far less superior. 

Prima 4 x 8" block with handle $17.24: 

Apple Pie Memories 4 pack $18.68: 

Inkadinkado Extra Large Acrylic Block $11.94: 


Fiskars Stamp Press and Martha Stewart Stamp Mount

Both of these are offered in a smaller and larger size. 
You can use these as your one and only stamping block if you want but there's other ones I'll mention later that have benefits in certain situations. I personally own the larger Fiskars Stamp Press and I like it for sentiment stamping. Even with some of my other stamping tools, I still use it for stamping large sentiments on the inside of my cards. The benefit of these type of stamping blocks is the foam feet provide height and stability so you can line up your stamp perfectly over your paper and then press straight down when it's in the perfect position. This also makes it easier to get stamps really close together without overlap such as when you are stamping a garden of flowers. You can even put all of the stamps on the stamp press and get it done in one shot. The large surface area makes this possible.
Compact Stamp Press at Simon Says Stamp $13.99: 

Fiskars Compact STAMPING PRESS Stamp Entire Project at Once 02958
Large Stamp Press at Simon Says Stamp $22.99: ( This is the one I own and it's $14.07 on Amazon)

Fiskars Easy LARGE STAMPING PRESS Stamp Entire Project at Once 08849

Medium Martha Stewart Stamp Mount at Amazon $9.24:


Small Martha Stewart Stamp Mount at Amazon $5.72:


Stampamajig

Stamp a whaaa? Yeah it's a mouthful but this little tool is a major help with wood mounted stamps. This 2 piece set includes a plastic bar and a clear plastic sheet. All you do is put the corner of your wood stamp in the corner and stamp straight down onto the plastic sheet. Then you take the plastic sheet and put it on the area you want to stamp and place the plastic bar on the sheet. Now you remove the plastic sheet, ink up your stamp and stamp down exactly where you wanted to. This is the best tool for getting straight stamping with wood mounted stamps. 

Sold at Amazon for $7.19: 


• Crafter's Companion Rock a Block
The Rock a Block is supposed to make it easier to avoid smudging or over-stamping by stamping in one smooth motion. You roll the stamp from bottom to top. I haven't used these myself because I already have many ways to get a good stamped image, but if I didn't already own a ton of stamping tools I'd definitely give these a try. I may even buy them for my Mom since I think she'd enjoy them. 

Sold at Simon Says Stamp for $14.99 for a pack of 4: 

Crafter's Companion Set of 4 ROCK-A-BLOCKS Stamping System 762398

• MISTI & Stampaholic

These bad boys are new to the scene and they cost a pretty penny! 
Both of these tools use the letterpress technique to stamp clear or cling mounted stamps (just remove the foam when using cling). This unique system makes it incredibly easy to re-stamp perfectly. You can also lay down an entire scene and stamp it at once. Grid patterned paper and rare earth magnets to hold your paper in place make this a fool proof way to get straight stamping done. There is a metal plate on the back that the magnets are attracted to. You also get rulers around the outside for extra precision. 
The MISTI (stands for Most Incredible Stamping Tool Invented) comes in three different sizes depending on your application. The Mini MISTI is perfect for card makers. The original MISTI is larger and makes stamping directly on the inside of a card base possible. The Memory MISTI has a 12 x 12" stamping space which is perfect for Scrapbookers! The MISTI's range in price from $49.99 to $110.00. This is an investment in your stamping and not a cheap tool by any means. There's also one called the Stampoholic which is around the same size as the original MISTI and it's $54.95 which is about $25.00 less than the MISTI. However, there is a patent on the MISTI which the Stampoholic may be infringing on. I am not a patent lawyer so don't take my word on it. Patents are expensive and normally get built into the cost of an item to make some money back. Many people own the MISTI and are completely in love with it. It's extremely useful when you are stamping multi-step stamps such as Altenew's Vintage Roses. I am a little cheap and have spent more than my fair share on expensive crafting tools (Silhouette Cameo 2 and the MINC machine to name a few!), so I did it as a DIY which we'll talk about next! 
Mini MISTI for $49.99 at Simon Says Stamp:


MINI MISTI PRECISION STAMPER Stamping Tool Kit mistimini
Full Size MISTI for $79.99 at Simon Says Stamp :

MISTI PRECISION STAMPER Stamping Tool Kit
Memory MISTI for $110.00 at Simon Says Stamp:

RESERVE MISTI MEMORY MISTI PRECISION STAMPER 12.25x12.25 Stamping Tool Kit mistimem

• DIY Letterpress Style Stamping Tool 

I found this video on YouTube and thought "Wow, what a great idea!"

There was a link below the video to the store that carried all of the necessary supplies. I recently went on their website again and it appears they have everything but the metal sheets by Darice. 
Here's what you need: 
DVD case  $2.99( or you can get a 10 pack here and store your stamps in them too!) 
Rare Earth Magnets $2.49 x 2 = $4.98 (or get an 8 pk here for $5.08)
Little B Perfect Positioner $3.99 (or $2.79 here)
Craft Foam $0.69 ( or $7.49 for a 10 pk and use the left overs with adhesive as full back foam adhesive on cards!)
Metal Sheet $9.67 ( this is more than you need so find another project to use the rest!)

Total cost for the DIY stamping tool is $22.32 if you buy everything you can from Hallmark Scrapbook and the metal sheet from Amazon. The Darice metal sheet was smaller and less expensive so hopefully those come back in stock some time. I've used mine more than a handful of times now and I really like it. I especially like being able to double stamp when I'm working on watercolor paper. 

• Stamping Pad

A stamping pad can help you get a nicer image than stamping on a hard surface. It lets the stamp sink into something. You can use a cheap mousepad or fun foam for this but there are special stamping pads out there that are a little thicker. Darice makes a rubber one and it has great reviews. Obviously you won't need this when using your MISTI or DIY stamping tool. 


That covers it for the best tools to get a perfect stamped image. I hope I have enlightened you today and you learned something or found a new tool you didn't know existed that will make your stamping a little easier and more fun! If you have any questions, please leave me a comment and I will be happy to help you out!